Understanding leaky faucet types is key to efficient repairs, as different issues like drippy aerators, worn O-rings, or damaged cartridges require distinct solutions. This guide provides step-by-step instructions on fixing common types of leaks, focusing on aerator cleaning, cartridge replacement, and preventive maintenance tips, including regular checks, insulation, and using waterproof seals. By following "How to Fix a Leaky Faucet" advice, you can prevent future leaks, conserve water, and ensure long-lasting faucet performance.
Are you tired of that nagging drip? Learning how to fix a leaky faucet is an easy DIY project that can save you money and water. This guide breaks down the most common types of faucet leaks and provides simple, step-by-step instructions on how to fix each one. From cartridges to compression valves, get ready to stop those drips for good. Additionally, discover prevention tips to avoid future faucet leaks.
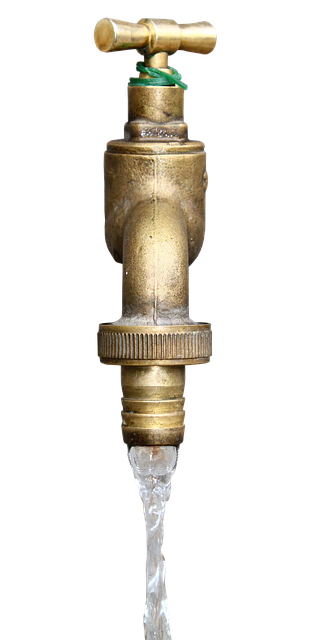
Identifying the Type of Leaky Faucet

Identifying the type of leaky faucet is the first step in knowing how to fix it. There are typically three main types: drippy aerator, worn-out O-rings, and damaged cartridge or valve seats. A drippy aerator is usually the most common culprit, causing a steady, slow leak from the faucet head. Worn-out O-rings result in drips that may increase over time, while damaged cartridges or valve seats lead to more significant leaks, often characterized by sudden gushes of water.
Once you’ve determined the type of leak, fixing it becomes more straightforward. For a drippy aerator, replacing the aerator is usually sufficient. Worn O-rings require disassembling the faucet and swapping out the damaged parts. Damaged cartridges or valve seats may necessitate complete faucet replacement, but many modern faucets come with easier repair processes. Understanding these variations equips you with the knowledge to tackle each leak effectively.
Steps to Fix Each Kind of Leak

Fixing a leaky faucet is often a straightforward process, but the type of leak determines the exact steps you need to take. Here’s how to tackle each common issue:
For an aerator-related leak, unscrew the aerator from the end of the faucet spout. Look inside for any debris or damaged parts. Rinse them off and reassemble, ensuring a tight seal. If the problem persists, it might be time to replace the aerator.
With a cartridge-style leak, you’ll need to access the inner cartridge. Turn off the water supply valves under the sink (usually located behind the faucet). Remove the faucet handle and any decorative caps. Using a wrench or screwdriver, unscrew the old cartridge and install a new one, following manufacturer instructions for proper alignment. Remember to turn on the water supply once the new cartridge is in place and test for leaks.
Preventing Future Faucet Leaks

Preventing Future Faucet Leaks is an essential step after learning how to fix a leaky faucet. Regular maintenance can significantly reduce the likelihood of future leaks. Start by periodically checking all faucets for any signs of damage or wear, especially at the base and the connections. Keep an eye out for loose parts or any unusual noises that might indicate potential problems.
Consider using waterproof seals and lubricants to protect sensitive areas and ensure smooth movement of parts. Additionally, insulate pipes to prevent freezing during colder months, which can cause pipes to burst and lead to leaks. Lastly, remember to replace worn-out parts promptly and stay vigilant, as a little regular care can go a long way in keeping your faucets leak-free.
Fixing a leaky faucet is easier than you think. By understanding the common types of leaks and their causes, you can tackle each issue with confidence. Following the step-by-step guides provided in this article will help you effectively repair your faucet, saving you time and money. Remember, regular maintenance and preventive measures can significantly reduce future leaks. So, armed with knowledge, take control of your plumbing and say goodbye to those annoying drips!