
TL;DR: To fix a leaky faucet, start by observing its behavior to identify the source of leakage (handle base, spout, or cartridge). Common causes include worn-out washers, O-rings, cartridges, or valve seats. For minor leaks, replace the faulty part; for larger leaks, shut off the water supply, disassemble, and replace the cartridge quickly. Regular maintenance prevents issues, making DIY repair feasible and cost-effective. Learn how to fix a leaky faucet with basic tools and know-how.
“Tired of that relentless dripping? Learn how to fix a leaky faucet in minutes with our DIY guide. Discover the essential tools and materials needed for this simple, cost-effective home repair. From assessing the leaky faucet to gathering your supplies and step-by-step installation instructions, we break down the process so you can stop the drip and save money. By understanding common types of faucet leaks and their causes, you’ll be equipped to tackle any issue head-on.”
- Assessing the Leaky Faucet
- – Identifying the source of the leak
- – Common types of faucet leaks and their causes
Assessing the Leaky Faucet
When faced with a leaky faucet, the first step is to assess the issue. Start by observing the faucet’s behavior—is it dripping consistently or intermittently? Note where the water is escaping from; common problem areas include the base of the faucet handle, the spout, or around the cartridge/valves. Visually inspect for any worn-out or damaged parts, such as broken seals, corroded components, or loose connections. This quick evaluation will help you understand the root cause and guide your DIY repair process, making it easier to how to fix a leaky faucet effectively and efficiently.
– Identifying the source of the leak
A leaky faucet can be an annoying and wasteful problem, but identifying and fixing the source is easier than you think. Start by carefully observing the faucet to determine where the water is leaking from. The most common culprits are the O-ring or washer located under the faucet handle, or the cartridge assembly inside the faucet body. If it’s a minor leak coming from the O-ring or washer, you can usually fix it yourself with just a few basic tools and a replacement part.
For larger leaks, especially if they’re spurting or consistent, the issue might lie within the cartridge. In this case, you’ll need to shut off the water supply under the sink before disassembling the faucet to access and replace the cartridge. This DIY process can be accomplished in just a few minutes with the right tools and clear instructions, saving you time, money, and potentially preventing further damage from water leakage.
– Common types of faucet leaks and their causes
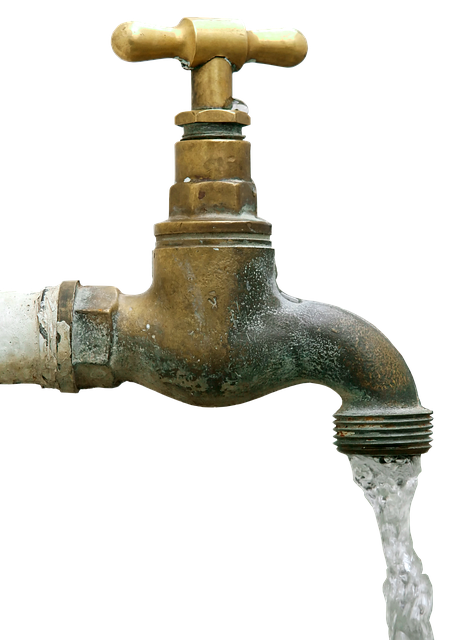
Leaky faucets are a common household issue, often caused by worn-out or damaged parts. The two primary types of leaks are drippage from the spout and continuous dripping from the base. A dripping spout usually indicates a faulty washer or O-ring, which can be easily replaced. Over time, these components wear out, allowing water to leak through. On the other hand, a leaky faucet at the base suggests problems with the cartridge or valve seat, which may require more intricate disassembly and replacement.
Understanding the source of the leak is crucial when learning how to fix a leaky faucet. Regular maintenance can prevent many of these issues, but sometimes, despite our best efforts, parts simply wear out. When this happens, DIY repair becomes not only feasible but also a cost-effective solution. With the right tools and a bit of know-how, you can stop that annoying drip in minutes.
Fixing a dripping tap is an easy, cost-effective way to prevent unnecessary water waste and keep your bathroom or kitchen looking neat. By understanding the common causes of faucet leaks – such as worn out O-rings or cartridge issues – you can quickly address the problem using simple DIY methods. With just a few tools and some know-how, you’ll be able to stop that pesky drip in no time, saving money and extending the life of your faucet.